How do hot-iron transfer embroidery patterns work?

One of my favorite times when I embroider is that moment when the pattern is transferred to the fabric, I've chosen all my threads and colors, and I'm getting ready to take my first stitch. I created the Kate & Rose hot iron transfer series to get you (and me!) to this moment faster. I wanted to make transferring these sometimes complex, exuberant and playful folklore patterns to your fabric easy, fast, and accurate. Let me tell you a little more about Kate & Rose embroidery patterns, their newly redesigned appearance, and how they work! A lot of research, care and thought has gone into the new pattern covers and instruction sheets because I wanted to give you something truly useful. I wanted these patterns to be unique in embroidery patterns because they're traditional while being a thoroughly contemporary product, with beautiful, easy-to-use color schemes and clearly illustrated, detailed stitching diagrams. The grand design scheme plays on the new web site design, and is meant to invite you to create, play with colors and stitches, to stop for a moment and dream of embroidery inspired by long-standing traditions of creative handwork. Let's talk about what's in the hot-iron transfer packages. There are three items in each package: the cover, the stitching instructions & tips insert sheet, and the transfer sheet itself.

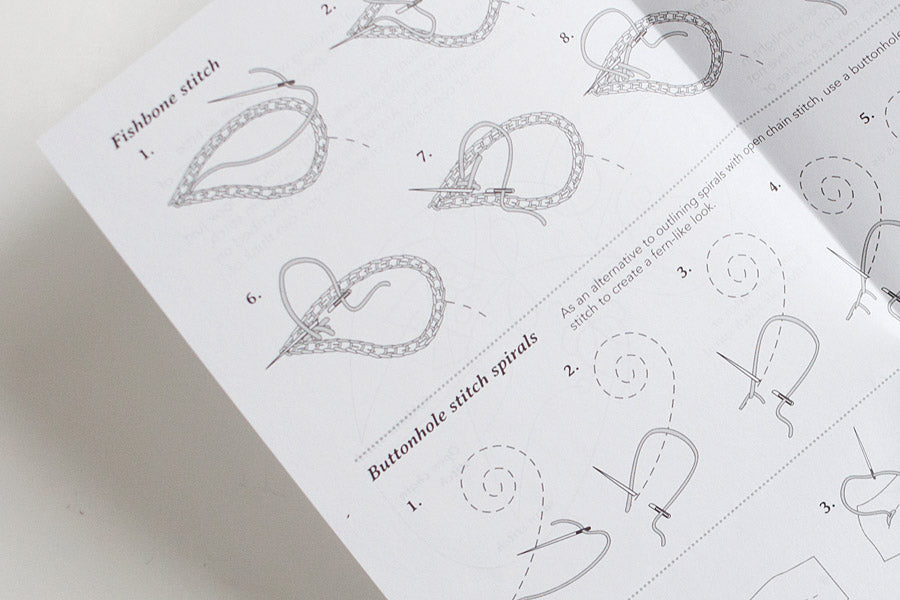
The cover is now in full color, and on the inside right you will find a color guide with DMC floss color numbers (really hope these don't get changed anytime soon!). On the left are detailed instructions for how to use the hot iron transfer sheet. (Package shown above is the Bewitching Botanicals hot-iron transfer embroidery pattern set.) A lot of care and attention went into designing the stitching instructions sheet, to make the diagrams as clear and easy-to-follow as possible. I also wanted to demystify the process of creating complex-looking folklore stitching techniques. The stitch dictionary is a bit like a reference book and includes a careful breakdown of each step of the stitches a traditional embroiderer would have used to create the embroidery.

The 12x18" transfer sheet just makes me happy. It is so very old-school it's almost vintage! It's the same kind of recycled-newsprint-with-heat-transfer-ink that makes me nostalgic for our grandmothers', maybe great-grandmothers' time. Like Aunt Martha's patterns, except the designs on the sheets are, of course, Eastern and Central European (sheet shown is from the Bewitching Botanicals pattern set):

Now let me show you how the heat transfer sheets work! First, take some scissors and cut around the designs you want to use (this sheet is from the Faraway Garden pattern set). Cut fairly close to the design without cutting off any of the motif itself.

Then we have to position it. An easy way to do it is to fold your pattern twice to mark it's center (this next design is from the Cabbage Rose Fancy pattern set):

And then mark the point on your fabric where you want this center point to go in the same way. Then, place your design there so the center points match.

Set your iron to dry (no steam) and high heat, and press, counting to 30.

To check if your design has transferred, lift a small part of it, making sure not to dislodge the transfer sheet's position on the fabric.

If it has not, fold it down and press again. If yes, you're done!

Embroider at will... I used mostly buttonhole filling stitch for this piece but you can do absolutely anything you like. To note: the transfer lines won't wash out but they will fade over time, especially if exposed to light.

I kept reusing this particular transfer until no more ink would come off of it and I was able to get 7 entirely usable imprints. Just sayin'!