Furoshiki project bags: a tutorial
I usually have several embroidery projects going at the same time, which means I'm always in need of project bags. As it did for the Uptown folk blouse, embroidery can take a little while, and I like to have something readily available for 15-minute-bouts of stitching here and there. Hence the project bags! Today I want to show you how to make Furoshiki project bags. These are soooo easy and quick! Furoshiki is also a great way to use smaller pieces of fabric (or several fabrics) that you don't really have any other clear idea for, or scarves you like but that perhaps aren't your best color. I'll show you three variations here that I've been using. I don't know what the actual name of each style is, so I tried to come up with something descriptive instead. If you know what these are called, do let me know!
Simple knotted handles, with two variations
First up, the tiny version. I keep a very small project in it that I'm making for one of my daughters. Small project = small bag!

I used a 19" by 19" square of hand-stamped blue-dye fabric that I really love, left over from the blouse I'm wearing in this post - fabric from the Tolna Indigo Workshop, which I also mention here. Here's the square I started with, folded like a napkin:

I hemmed it by folding under 1/4" then another 1/4" to the wrong side along all the edges.

The rest was super easy too! How to make the bag: 1. Take two adjacent corners...
2. ... and tie them together into a small knot to form a handle.

2. Repeat on the other side, and you're done: you've got yourself a tiny fabric basket!

You can also slip one of the handles through the other, in which case it looks more like a very tiny purse than a basket.

Here's the other side:

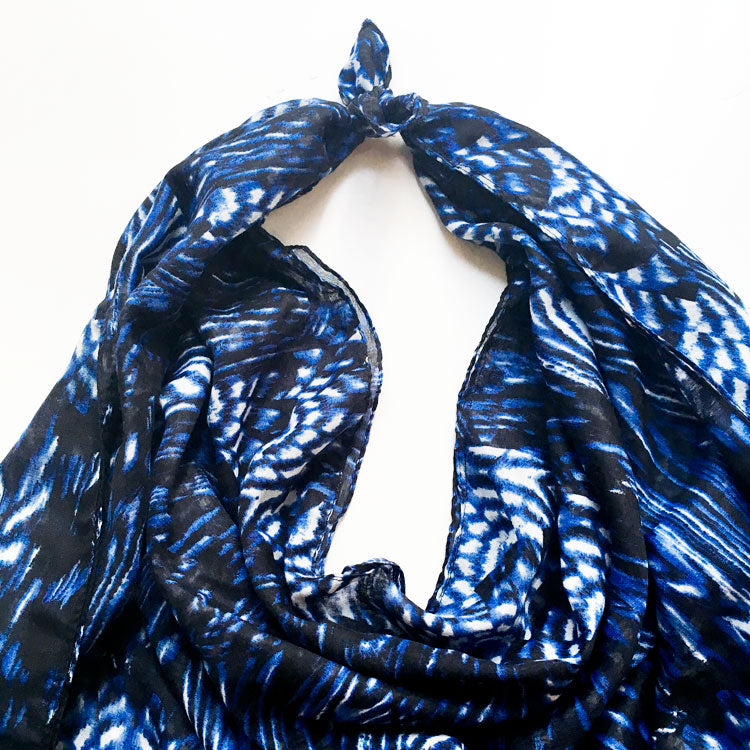
I also made this with a much larger piece of fabric:

I used an inexpensive shawl here that I've had for years. (I have tons of inexpensive shawls and scarves that I keep around in case children who show up in my household - in addition to mine - might want to put on an impromptu fashion show. You might be surprised how often this happens. When I was growing up, my grandma always had tons of scarves that we grandchildren could play with to our hearts' content in the same way and I started collecting shawls and scarves even before my daughters were born. But I digress.) The shawl I used was a 36" by 72" rectangle that I folded in half, then sewed the two folded-up layers together to get a 36" square.
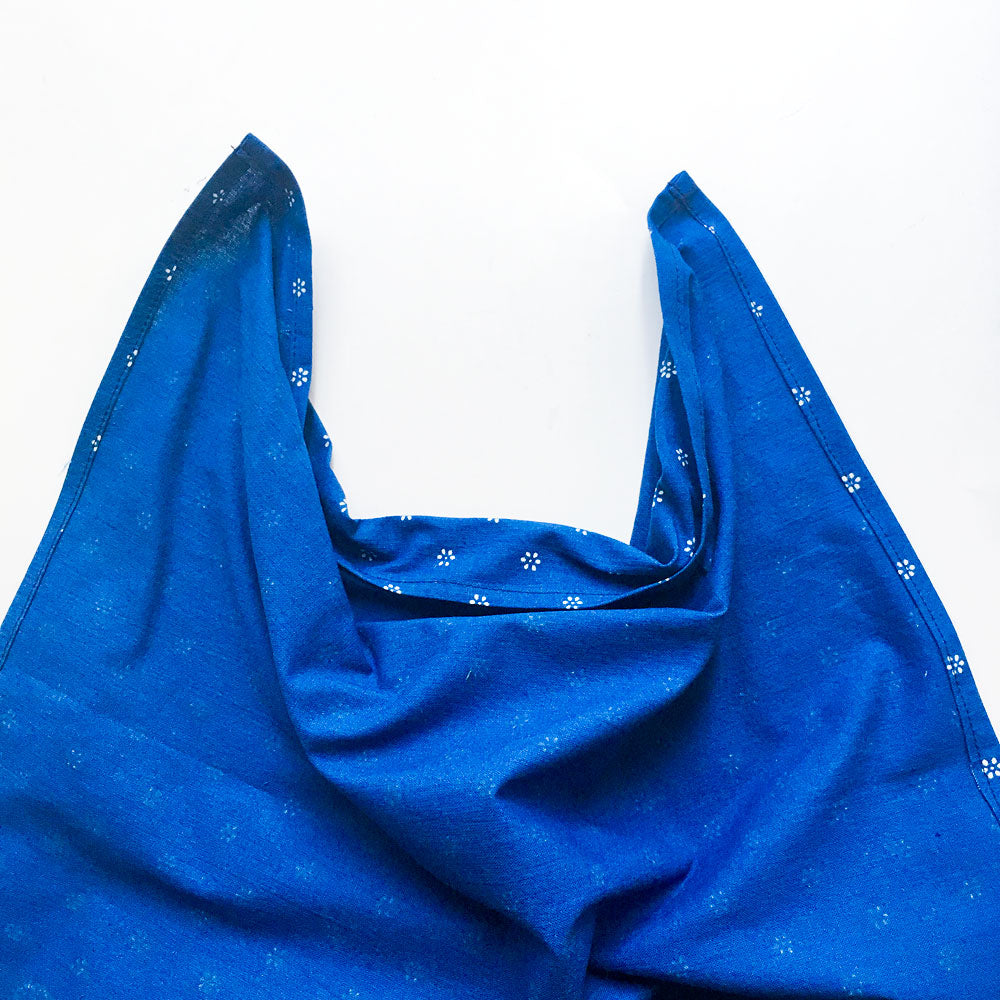
How to make the bag: 1. Once again, take two corners that are adjacent to each other, and tie them into a small knot, one with very small rabbit ears.
2. Repeat on the other side, so that you end up with two long handles. Voilá, your bag is done! Makes a pretty nice shoulder bag, if I do say so myself.
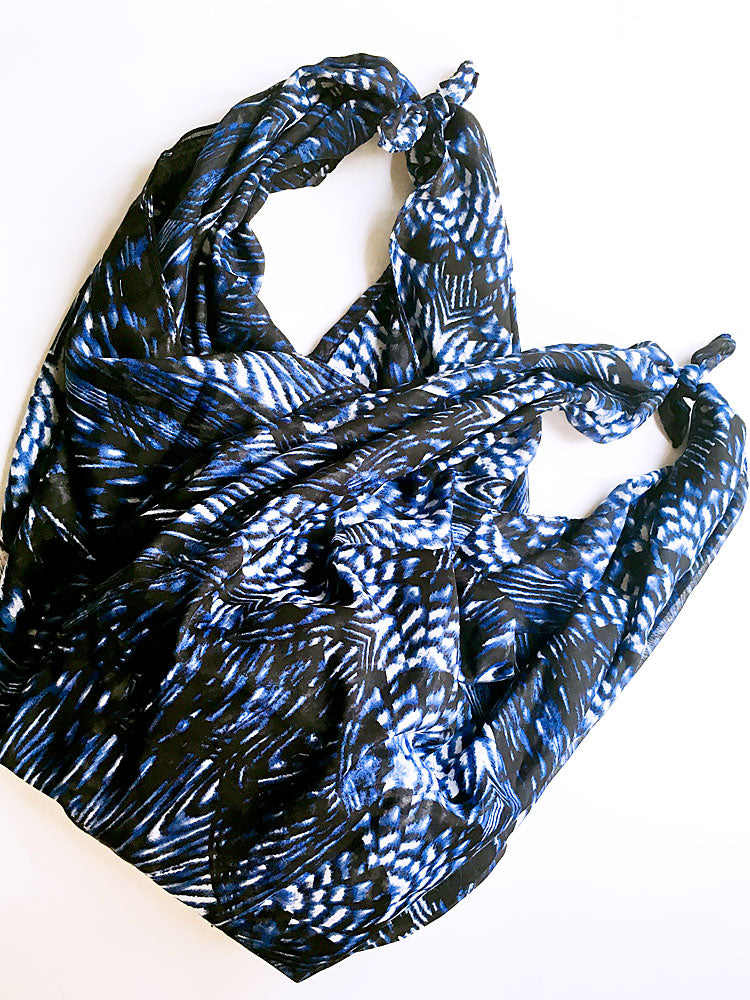
3. For the slip-one-handle-over-the-other-version, I varied it up for this bag. Here's how: make the second set of knots, on the other side of the bag, with much longer rabbit ears, tying them so you end up with a much smaller handle than the first one.

4. Then, after loading up your bag, slip the longer handle into the shorter one. Look, it's a whole other kind of shoulder bag!

I keep my Alabama Chanin project in it. It's slow going so the project bag is very necessary.

Many-knotted handles
For this next bag I used a piece of batik fabric I got in Truemart Fabrics. The project I currently have in this bag is a plain white Old Navy summer top that I'm "folklorifying" with some colorful embroidery from the Faraway Garden pattern set.

I started with a 42" square that I hemmed the same way as the leftover blue-dye fabric.

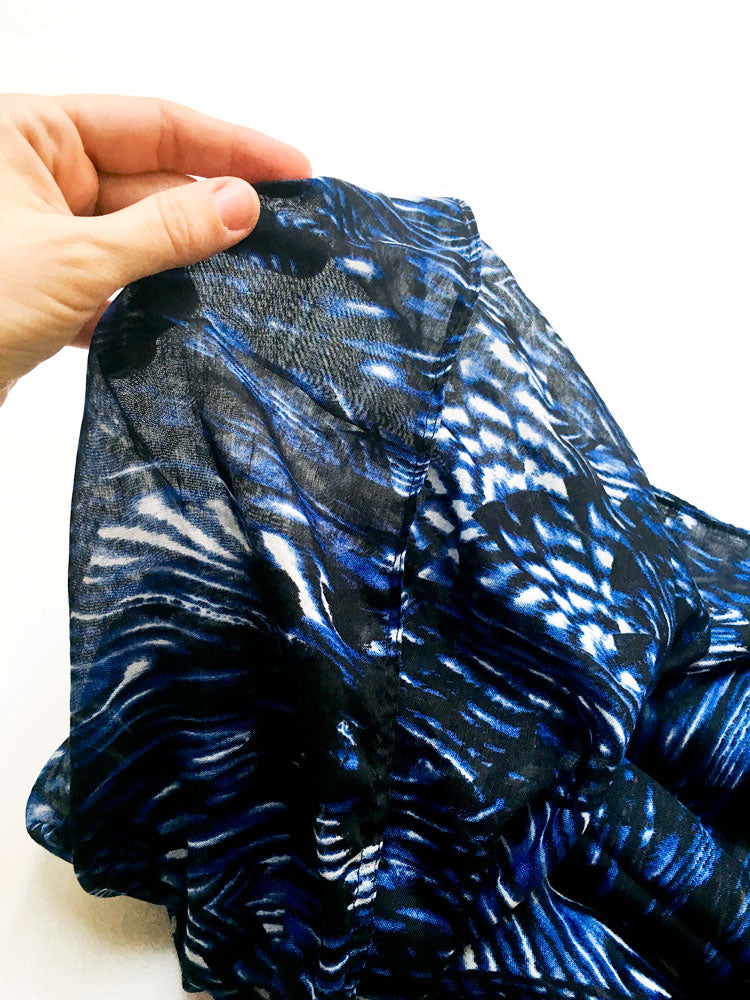
How to make this: 1. This time, gather up the material towards one corner kind of unevenly. If you imagine where the open part of the bag will be, gather in a shorter length of that edge, and a longer length at the edge that will have the handle.

It should form something like a very lopsided tail or rabbit ear. Or... I'm not sure what body part of what animal, but something like what you see below.

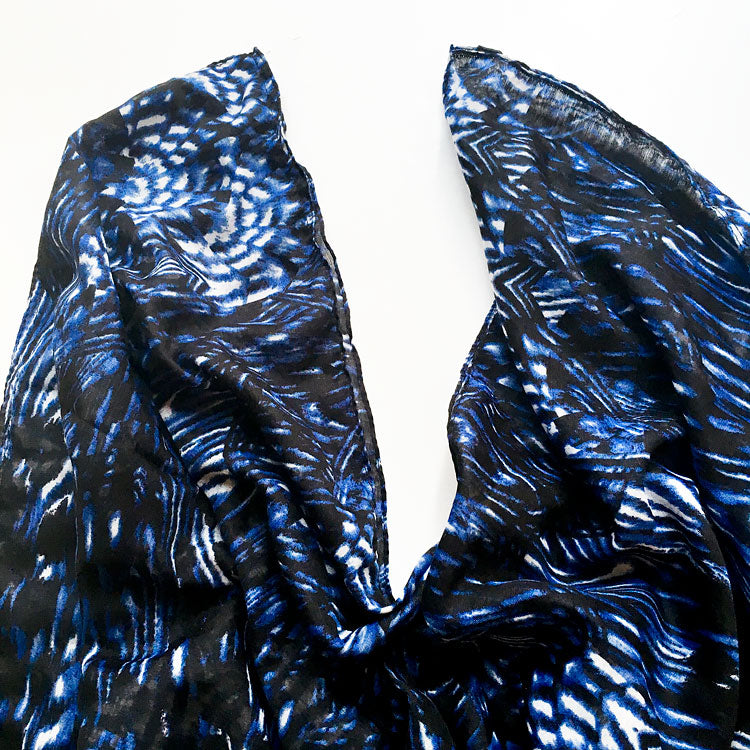
2. Tie a knot at the point where my hand is above, distributing the fabric so that the unevenness of the edges isn't terribly obvious and you're left with a long "tail" hanging out of the knot.

3. Repeat with the corner next to the edge which is now shorter, mirroring the lopsidedness of the gathered-up fabric, so that you end up with two knots that are just about next to each other, forming two tails (or two rabbit ears).

4. Tie the tips of the two tails/ears together to complete the handle.

5. Repeat all this on the other side, and you're done!

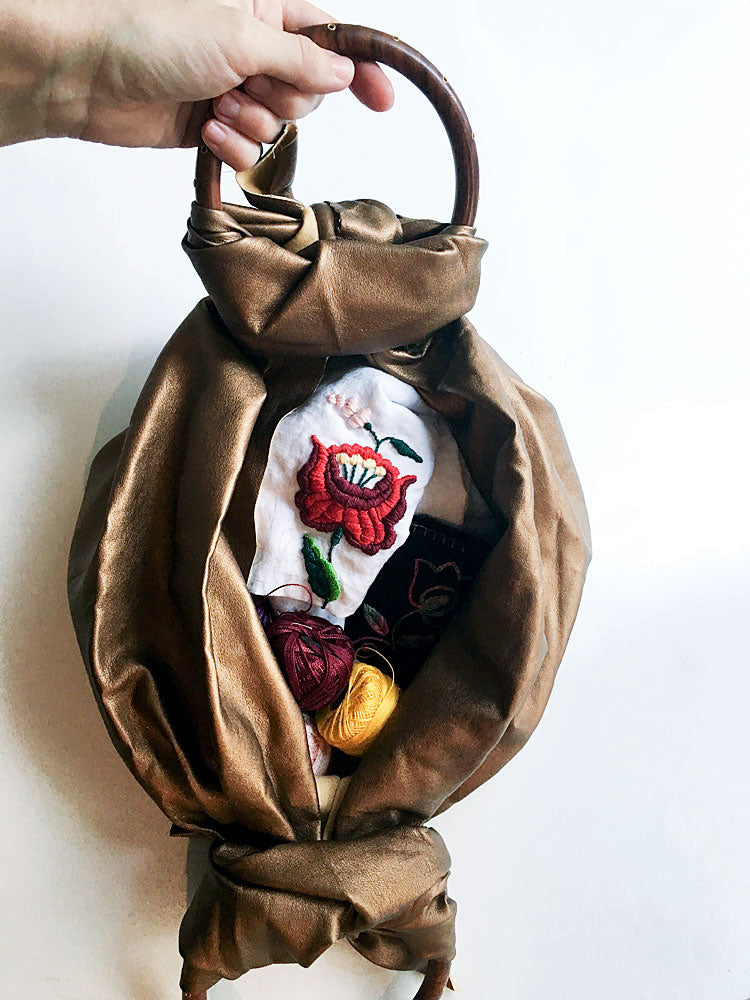
Fancy purse with wood handles

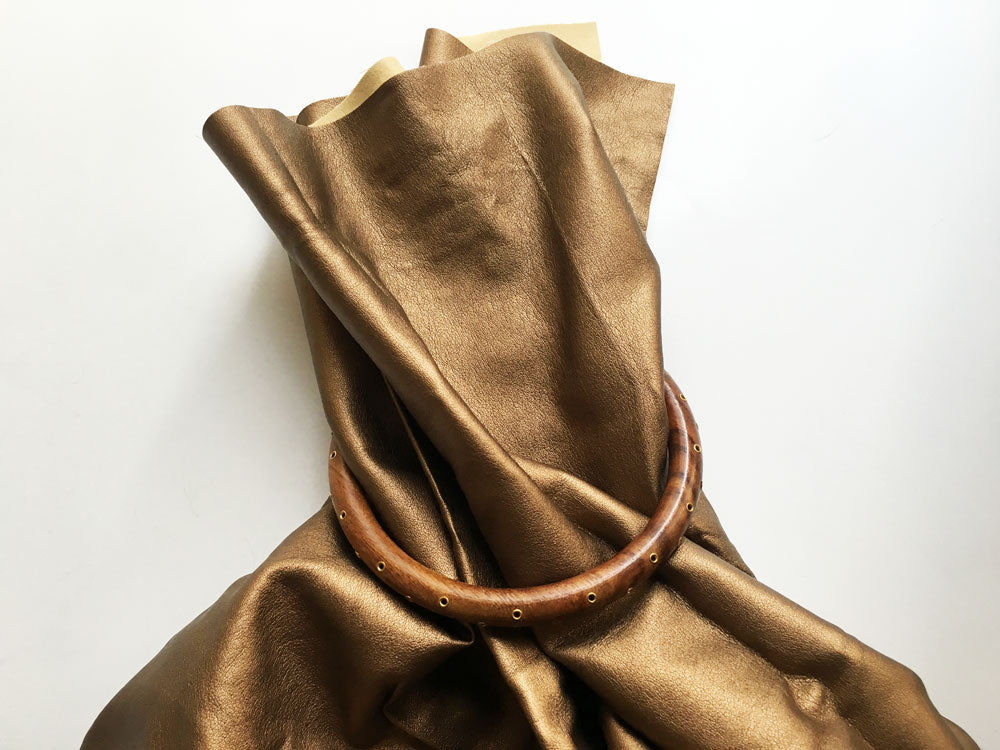
This bag's structure is similar to the previous one, except with wooden handles instead of several sets of knots. Currently it holds several of my satin-stitching projects for which I'm using the same color threads. For this somewhat fancier bag, I used a square of gold-tone vegan leather I got at a swap a while back but a large shawl made of a fabric with a bit of body would do just as well. I do like the vegan leather because it protects my threads and fabric from water as well (in case a child spills something nearby, ahem). I bought the two 5 1/2" wooden ring purse handles at Pacific Trimming, but these ones from Amazon or any of these from Joann's would work just as well.

How to make this bag: 1. Pull one edge of the fabric through one of the handles.
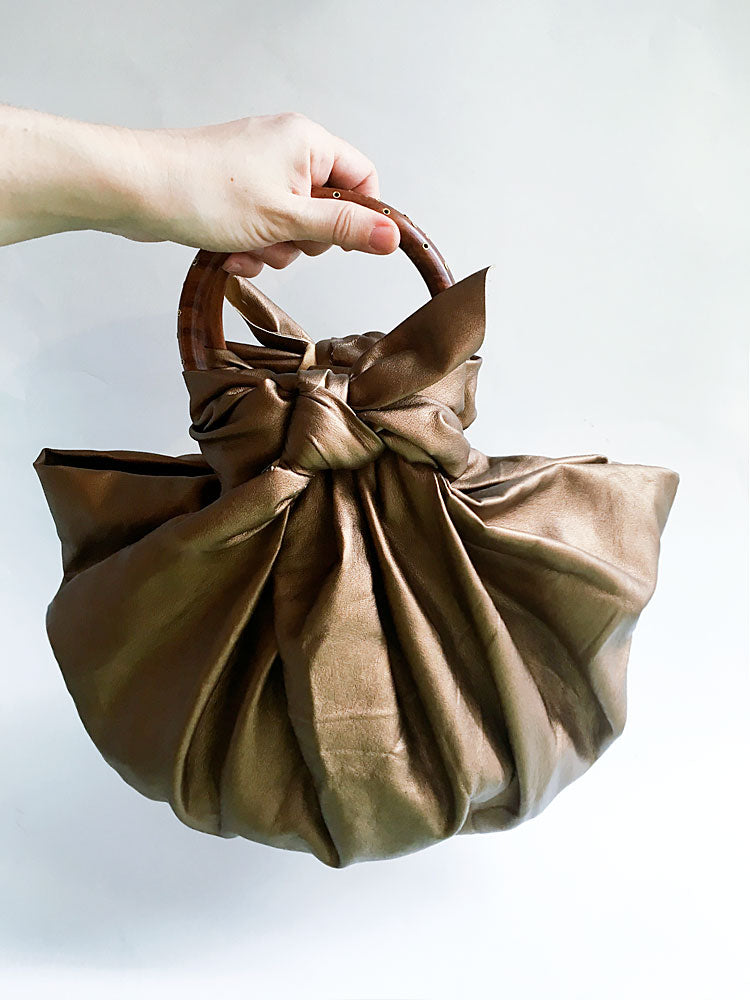
2. Pull and spread the corners of the fabric until they form rabbit ears that point away from the handle on either side.


3. Fold the fabric under to the wrong side of the fabric (this will be the inside of the bag), then loop the rabbit ears around the bottom of the ring, to the right side of the fabric (the outside of the bag), and tie into a knot.

4. Repeat on the other side, and your bag is done!
So easy, right? Yet so many possibilities... And so much stitching to do!