About the back of embroidery
When I learned to embroider in elementary school we were told in no uncertain terms that the back of one's embroidery absolutely must look as neat as the front. No excuses, no exceptions.

These days I'm more inclined to think that you should do whatever gets you started - knots, long tails, a big giant mess, it's your embroidery, after all. Sometimes there is really no reason to care what the back of your embroidery looks like. When I made the sample above from the Bewitching Botanicals pattern set, I really just wanted to get it done. Here it is from the back:

Yes indeed: a big giant mess! I planned no particular use for this sample beyond photographing it so I knew it didn't have to be particularly durable, and did not worry about what the back looked like. There are knots, tons of threads criss-crossing, and just plain tons and tons of thread that could get snagged and pull everything out of place. A side note: you can also see why I don’t usually use back stitch - most of the thread ends up in the back! My cheap Eastern European heart clenches up at the idea of wasting so much of the thread on the back of a piece of embroidery.
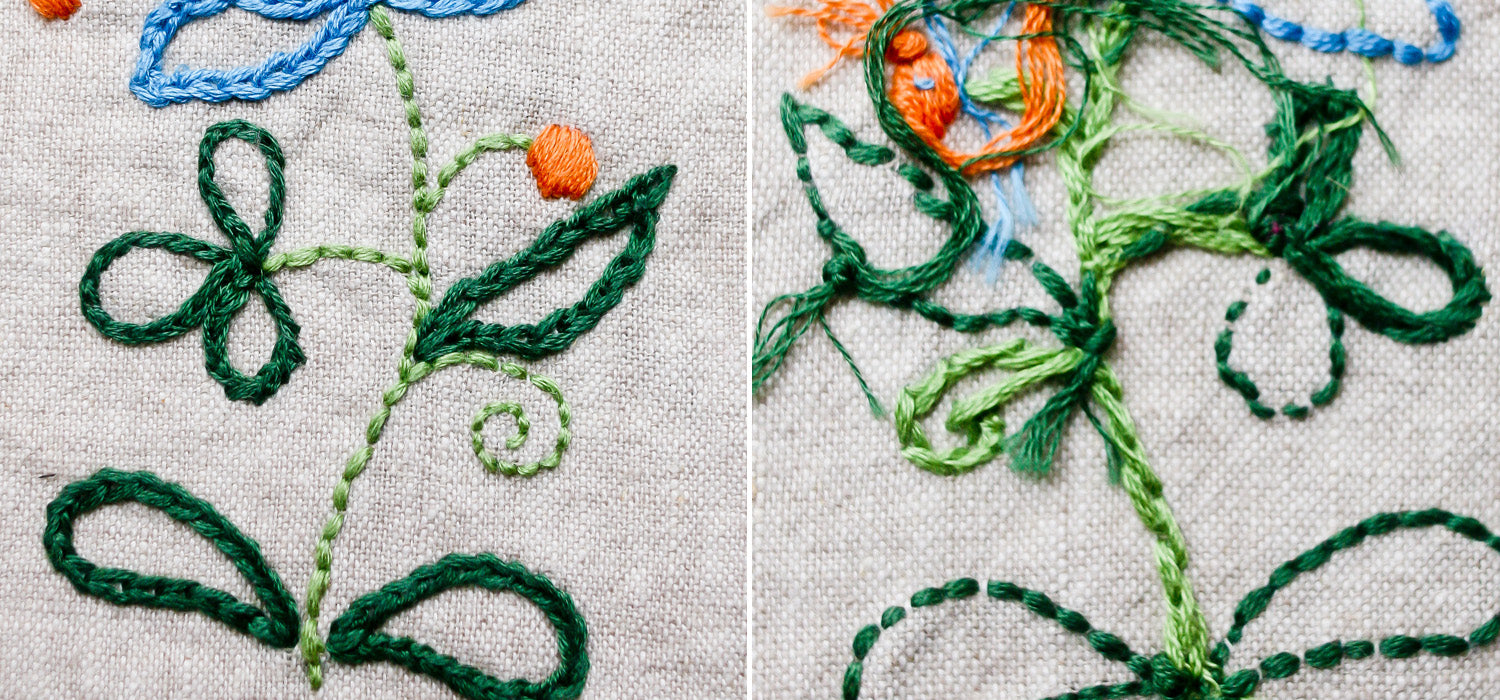
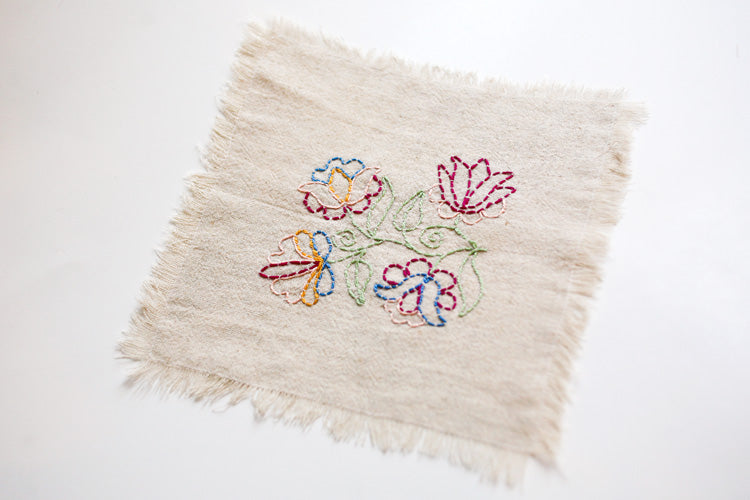
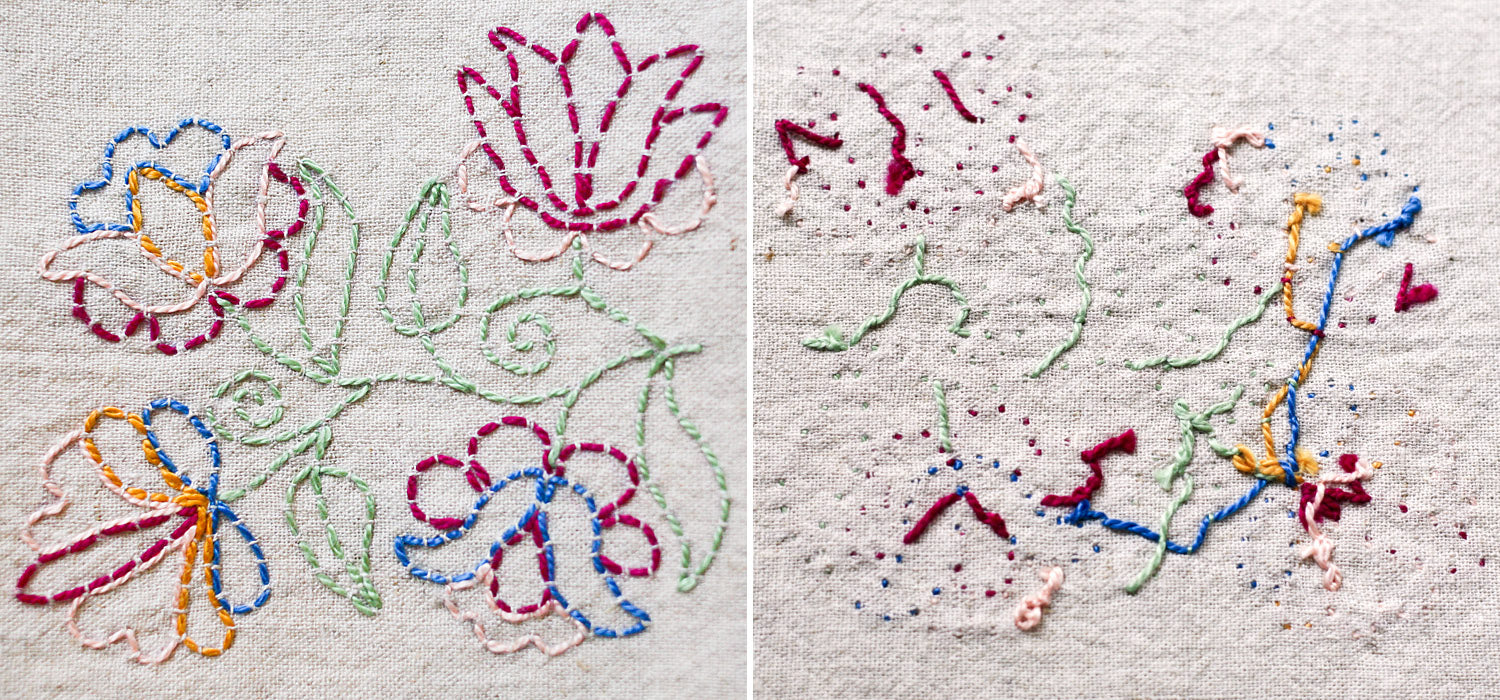
You see what I mean? The backstitching of the flower stem forms stem stitches in the back. There is SO MUCH MORE thread in the back. By contrast, I made this sample for the Cabbage Rose Fancy pattern set with a lot more care as to how the back looks because I had a bit more time to do it. It made my cheap and obsessive Eastern European heart jump with joy.

There are times when this obsessive approach really does make sense. When stitching household textiles or a garment, it’s a good idea to make the back is as neat and smooth as possible, almost as much as the front. Since the finished work will be worn, used, handled, and laundered, knots and loose threads on the back could get caught and pulled, ruining your embroidery. For example, take a look at this vintage blouse I bought a couple years ago:

I can't be completely sure but I think this blouse must be from the 1930s or so. It's made of a very lightweight fabric, possibly silk georgette, and the embroidery is immaculate, front and back. Since this blouse is light and airy and does not have any facings that could cover and protect the back of the embroidery, the stitching has to protect itself. Here's the front and back side by side:

They're both gorgeous, aren't they? And absolutely immaculate. You can see that the delicate fabric tore at the bottom of the neckline opening and had to be mended. But the meticulously done embroidery is flawless even after all this time. There are a couple of reasons the stitching was made to look the same on the back as the front. For embroidery to hold up through wear and laundering and so many years on a delicate fabric with no facings, it really has to be as smooth and neat on the back as possible. Knots or threads that aren’t part of the design could pull the stitches askew or even dislodge them. On this blouse, the embroidery held up even while the fabric did not. But the delicate, translucent nature of the fabric means something else too. Knots, starting or ending threads, threads led from one area to another would show through, if they weren't perfectly hidden by the embroidery itself. I applied the same philosophy when I made the front panel of this Róza blouse (embroidery design is from the Cabbage Rose Fancy pattern set):

Here's a detail of the front and back of the embroidery:

It's not quite as gorgeous as the 1930s blouse but it's lasted a few years now. (The back of this blouse actually looks atrocious - I sewed using a sewing machine purchased at Tesco in our summer cottage in Hungary.) But sometimes it’s harder to hide thread in the back. A tiny napkin I made for my daughter is a good example (design from the Bewitching Botanicals pattern set):
I used a running stitch variation culled from a book about Chinese embroidery to outline each line of the design, which made for quick stitching yet produced very pretty results. I knew it will get quite a bit of wear and will need to be washed, so I wanted to keep the opportunity for snagging and destruction to a minimum.
I made sure to start and end each thread within the stitching lines so there are no knots. You can see that I did lead the threads from one area to another several times, but I tried to make sure I used the design’s lines to secure these threads, and to use much more of the thread on the front than the back. So there you have it! Keeping the back of your embroidery neat is not always just about OCD behavior.